
This page may have Commerce Content. If you buy something from our posts, we may get a small share of the sale. Click here for more.


Editor & Article Writer for Outdoor Wilds
As an Amazon Associate I earn from qualifying purchases. Thank you for helping to support the site.
How to Prevent Trail Camera Condensation
Trail camera condensation has to be the most common problem faced by trail camera owners. Especially during early morning hours as the sun rises.
This article takes a look at the problem of condensation build up on the camera. Offering ways to decrease the chance of your trail cam taking blurred or white pictures as a result of moisture covering the lens.
I’ll briefly go over what causes condensation without going into too great a scientific detail. Check this article out if you’d like to know more about the causes of condensation and dew points.
However, a basic understanding of how this occurs will help give you a better idea on where to place a trail camera to avoid the worst exposure to moisture in the air.
How Dew Point Affects Trail Cameras
The dew point is the temperature at which water vapor in air naturally begins to condense into water. Morning condensation (dew) is the most common problem. This results in pictures taken by your trail camera being either blurry or worse still completely white.
Moisture In Soil
Where does this moisture come from and why does it usually occur at dawn as the sun rises? Soil moisture is the biggest cause of dew especially after heavy rainfall.
The damp soil releases moisture into the air as the sun rises along with the air temperature causing the soil moisture to evaporate.
The worst time for morning dew is after heavy rain, followed by a clear night. You can expect to see heavy dew each morning for several days in this instance.
Camera Placement
Where you place a trail camera does have an affect on how much the camera is exposed to condensation caused by dew.
Try to avoid setting the camera in low areas such as ravines. Moving the camera up the ravine if at all possible will help. Marsh land and other damp low lying areas are best avoided to keep condensation to a minimum.
Fields can be problem areas for trail cameras, where early morning fog banks rise from the moisture evaporating from the soil.
This is a common problem seen with trail cameras set at the edge of a field while covering a food plot. Placing the camera further back from the edge of the field can decrease the chance of condensation on the lens.
Condensation On The Camera Lens
The camera lens is the most likely part of the camera to be affected by condensation. It most commonly occurs at dawn when the surface of the camera lens is cold and the surrounding air temperature rises.
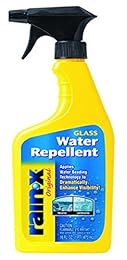
Treating the camera lens with a “water repellent” solution can help a lot with condensation build up. The downside is, it only lasts for several weeks at best, depending on the environment the camera is set.
Anti-Fog Lens Solution
There’s a number of rain repellent / anti fog solutions on the market. They’re specifically designed for the automotive industry. However they can do a great job of keeping camera lenses free from water moisture as well.
Rain-X is one such solution. It’s relatively low cost and quick to apply to a trail camera lens.
First off, make sure the camera lens is dust and dirt free.
Use a damp microfibre cloth and wipe the lens in concentric circles, starting at the centre of the lens.
Take a Q-tip and spray a small amount of the solution onto the tip. Wipe the Q-tip around the lens and leave to dry. Once dry you’ll notice a thin white film on the surface of the lens. Use another small microfibre cloth and buff the white film away.
The lens is now treated with the anti-fog solution. You will see a marked improvement with condensation build up compared to an untreated lens. Just remember to reapply every time you check on the camera.
Condensation Inside The Camera Shell
Although less of a problem compared to the camera lens misting up. Condensation can be a problem in high humidity environments.
Over time this may cause corrosion in the battery tray compartment and worst case the circuit boards inside the camera.
Fortunately there is an easy solution to this problem.
Small silica gel sachets placed inside the door of clam shell design trail cameras will absorb 3 times their own weight in moisture.
The sachets keep your camera free from internal condensation build up.
No products found.
Final Thoughts
In summary, if possible try and set the trail camera higher off the ground away from the dew zone and rising condensation off the soil.
Apply an anti-fog solution to your camera lens as much as possible throughout the season.
Lastly, place a small silica gel sachet just inside the door of your trail cam.
There isn’t a 100% fullproof method to stop condensation causing havoc with your pictures and general workings of your trail camera.
These methods will greatly reduce the chance of having an SD card full of blurred and white pictures taken in the early hours.
Read my guide if you’d like to know more about general trail camera maintenance, which covers best practice techniques to keep your trail camera running for longer.
For additional accessories take a look at my dedicated post listing 10 essential accessories for trail cameras.
Shop For Camera Lens Treatment
No products found.
Popular Posts

