How to Hide Trail Cameras from Humans – (Guide)

How to Hide Trail Cameras from Humans
Rob Johnston
Rob Johnston

Editor & Article Writer for Outdoor Wilds

How to Hide Trail Cameras from Humans

This article takes a look at various ways on how to hide trail cameras from humans, and also lessen the chances of game animals being spooked by your camera.

Hiding trail game cameras is not an exact art. The following methods described in this article will however conceal your camera from humans with a degree of success.

Each method of hiding a trail camera I talk about have their benefits in certain set ups, which I’ll mention throughout the course of the post.

Let’s dive in and take a look at how to hide a trail camera.

Table of Contents - Fast Navigation

Camera Height Off The Ground

The height at which a trail camera is set is one of the most important aspects of trail cam concealment from humans.

If the camera is set between around 3 to 6 feet, it’s most probably going to be in the eye line of someone walking around the area.

Deer Trails

This is a problem if you’re covering a deer trail, as the ideal height to set the camera is around 3 to 4 feet for detecting movement along a trail.

You should be setting the camera at 45 degrees to the trail so this does negate some of the chances of the camera being spotted by a human, as they would usually be following the trail and looking ahead.

Low level camera placement

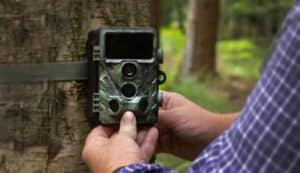
There is of course a chance the camera will be seen. At low level heights, it’s easy for anyone to rip the camera. I’d suggest using a Python lock at least, to stop any opportunists. Read my guide if you’d like further information non how to lock a trail camera to a tree.

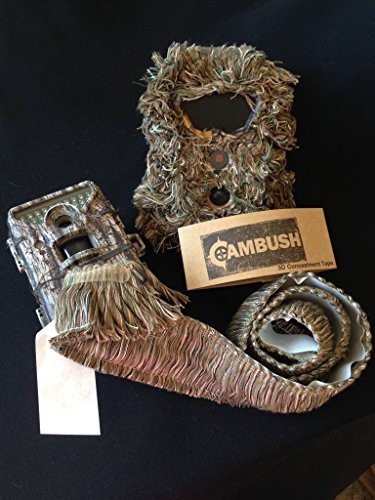
For low level camera placement, you’re going to have to rely on camouflaging the camera using various techniques which I’ll take a look at below.

Elevated Setups

Setting the trail camera in an elevated position is not going to be much use when covering a deer trail, as the animal will just run through the frame quickly, so there’s a chance of an empty picture or video clip.

Placing a trail camera higher up a tree at around 10 to 12 feet is ideal for covering food plots and other static locations, where deer spend a period of time at that location.

Tree climbing methods

In order to set the trail camera around 12 feet off the ground you’re going to need a method of reaching upto that height.

Tree climbing sticks are ideal for the job of gaining access higher up a tree. They are fairly light to carry and quick to set up.

Something like Ameristep Screw-In Tree Steps [1] are an alternative to carry a climbing stick with you. They are lighter and will fit inside a backpack. It is illegal to screw anything into a tree on public in most areas, so check to see if that applies to the land your scouting.

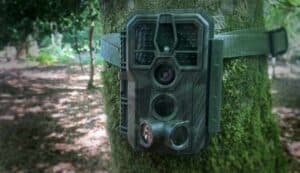
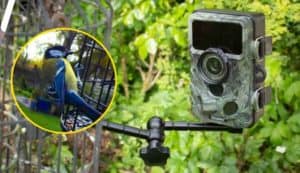
No Glow Infrared Red LEDs

The LED flash on a trail camera illuminates any detected wildlife at night. The pictures and video recorded under an IR flash are black and white.

Typically, there are 3 types of LEDs on trail cameras these days.

  1. Red Glow
  2. Low Glow
  3. No Glow – (Black Flash, Covert, Invisible flash)

No glow IR LEDs are invisible to both humans and almost all wildlife, so I’d suggest using a No glow trail camera if you suspect any humans will be around at night when your camera is operating.

The Infrared light that is emitted from the LEDs is measured in nanometers. 940 nanometer is the lowest in the spectrum that is considered true no glow or invisible to humans.  

It’s worth checking the trail camera specification to see if the camera has 940nm IR LEDs.

Type of Tree To Attach The Camera

The choice of tree is more important for the lower height set ups. Placing the camera of a narrow telegraph pole type tree makes the camera far easier to spot.

Split trunk trees are great as they allow you to place the trail camera between the trunks. This gives an immediate natural cover for the camera from a number of angles.

Shedding bark hickory trees is a great choice of tree to hang a camera. They break up the silhouette of the camera if you place a few pieces of bark behind the camera housing.

Alternatives to Trail Camera Mounts

I’m a big fan of trail camera mounts in certain situations such as on private land or fixed to a post by the edge of a field.

The disadvantage with a trail camera mount is the increased outline it gives to the camera due to the camera being set a distance off the tree trunk. This makes cameras a lot easier to spot by the human eye.

If you’re putting the camera in an elevated position this is less of a problem of course. At lower heights it may not be ideal to use a mount when trying to conceal a trail camera.

Attach To Trees Using Paracord 

Tree straps that come supplied with a trail camera are one of the biggest giveaways of a camera location. They just don’t look natural having a straight edge wrapped around a tree.

Heavy breaking strain paracord makes a great alternative to a tree strap. Tie a loop at one end of the cord and wrap around as you would with a tree strap. You’ll need at least 6 feet of paracord for this.

Pull the cord tight with enough slack to pitch the camera angle down and place a small stick behind the camera to act as a wedge.

Avoid High Footfall Areas

Try and avoid any area that you may think has a lot of people walking or hiking along. Find wooded areas off a trail, somewhere that no one would have any reason to go to.

If you think there’s a chance of humans walking past, then place the camera at an elevated height if possible. 

This is where camouflaging a trail camera may be a good option to help conceal the camera from humans.

Camouflaging Trail Cameras

Camouflage is an art in itself. In essence when it comes to trail cameras you’re trying to break up the straight edges of the camera housing by using any natural foliage fixed behind the camera or next to the tree.

It’s worth taking a look around the base of a tree to see if there’s any loose bark that can be wedged at the sides or on top of the camera.

Camouflage has to look natural, otherwise it can have the opposite effect. Placing foliage that isn’t’ natural growing around a tree may look out of place and draw attention to the spot.

Cambush is a company that makes 3D camo tape that sticks onto the outer housing of the camera. It’s just a matter of cutting the tape to fit the camera’s facia.

See the pictures below for an example of Cambush in the field. Find out more information about Cambush here.

Always make sure the camera lens and PIR sensor are not obscured by any camo materials that you’re using.

Final Thoughts

When it comes to trail camera concealment there is no exact technique or method. It all comes down to what type of environment the trail camera is set up to and the type of detection zone the camera is there to cover.

The key is to adapt to the situation and environment by thinking of the height of the trail camera and the type of tree that it’s attached to.

Use any natural camouflage thats available and try to keep the outline of the camera to a minimum.

I hope you’ve found some of these tips useful or at least given you some ideas on the best way to keep your cameras from getting spotted by humans.

Let me know in the comments what you think and any further suggestions you may have on trail camera concealment.

Popular Posts