This page may have Commerce Content. If you buy something from our posts, we may get a small share of the sale. Click here for more.

Editor & Article Writer for Outdoor Wilds
GoPro Max Field of View Examples
In this article I take a look at the Gopro field of views available on the Gopro Max action camera in flat video mode.
The Max does share the same field of view options as most of the latest Gopro camera models so there is an overlap there, so this will also be of interest to a Hero 9 Black owner for example.
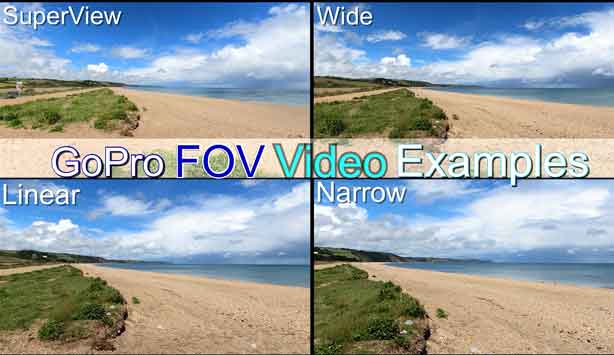
4 Field of VIew (FOV) Available
Let’s now take a look at the 4 FOV available on the Gopro Max. Starting with the widest.
- Superview
- Wide
- Linear
- Narrow
The names of each FOV are self explanatory I would suggest, but what do they actually look like when recording video footage you may ask, and which is best suited for certain types of filming.
To help answer these questions I’ll go through each of the 4 fields of views in turn and outline what each is and how to best use them.
Examples of Field of View (FOV)
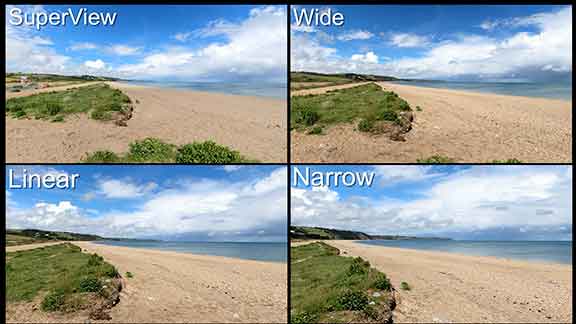
I have also uploaded a video onto our Youtube channel with examples of both static or locked off tripod shots of each FOV in side by side comparisons, plus as a bonus some tracking or walking shots too.
Best Uses For Superview
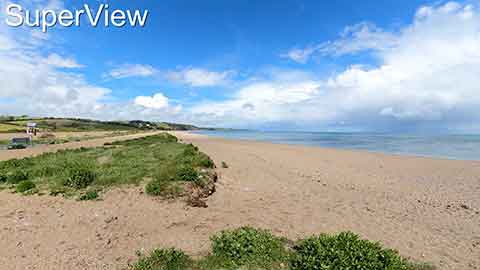
Superview is the widest of the 4 FOV. It’s great for panoramic shots of landscapes and also as a point of view shot of yourself during action sports.
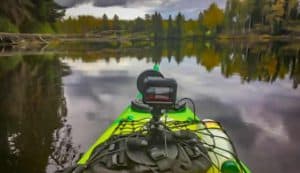
By that I mean, if you’re skiing or kayaking and you have the camera mounted on a selfie stick pointing towards you then Superview FOV is great for this type of video shot.
Although I suggest using Superview for the above single take shots that are not going to be part of edited video.
IF you’re planning on filming a completely edited video then I’d also take some shots in Wide FOV too.
Wide FOV
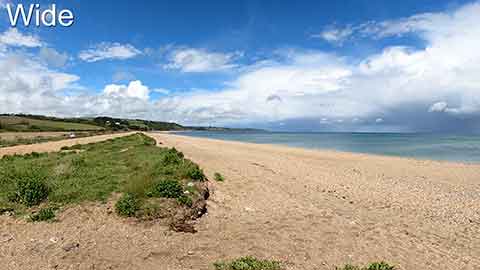
As mentioned above, Wide FOV is great for those selfie shots with less fish eye effect. Fish eye is the distortion you see in the video frame when using Superview.
I like to use Wide FOV for scenic shots in cities and urban areas as the distortion is less pronounced in the verticals of buildings compared to Superview.
If you’re filming in a busy street and want to walk along the street then Wide FOV is great for this type of shot.
Linear FOV
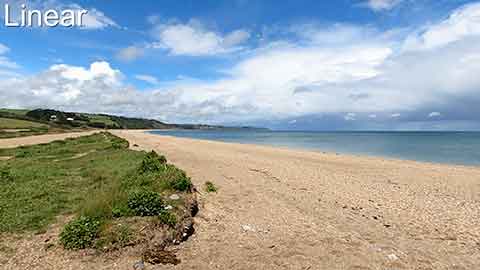
This is the most natural of the 4 FOV available and is more akin to human eyesight. This means there’s hardly any distortion (Fish eye effect) making it great for close up shots of people’s faces.
Linear is ideal for those “B roll” shots of the action. For example a shot of the kayak paddle cutting through the water. Or a ski boot being clipped into a ski binding.
Again these types of shots are great if you’re going to edit a dynamic video with lots of different angles and locations.
Narrow FOV
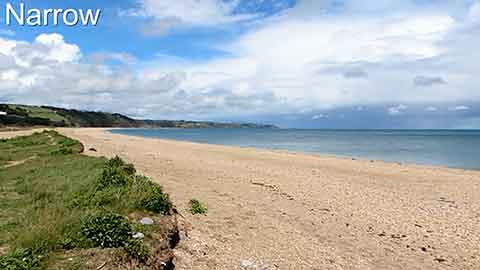
This is the narrowest as the name suggests and one I rarely use. The Gopro crops into the sensor to give this FOV the closest video image.
It does have its uses though. For example if you have something on a table, perhaps a meal in a restaurant or a drink that you’d like to record a video shot, narrow FOV is more suited to this type of framing.
Final Thoughts
Experimenting with the 4 FOV available is the best way to get a feel of how each makes video footage appear.
If you’re editing an action sequence then mix it up a bit and use different FOV as discussed earlier in this article.
There are no hard and fast rules and these are only suggestions as to how to best use each FOV in practice.
Drop a comment below if you have any suggestions on how to use FOV when skiing, kayaking or mountain biking below in the comments section.
Popular Posts


