This page may have Commerce Content. If you buy something from our posts, we may get a small share of the sale. Click here for more.

Editor & Article Writer for Outdoor Wilds
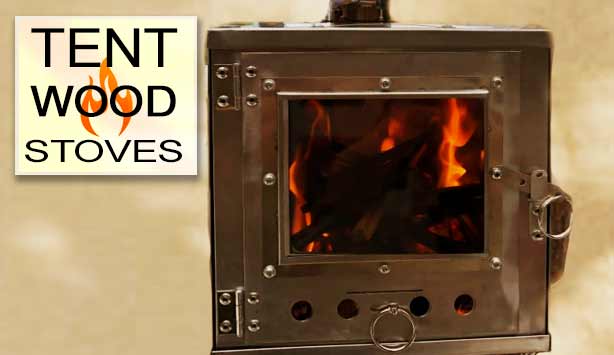
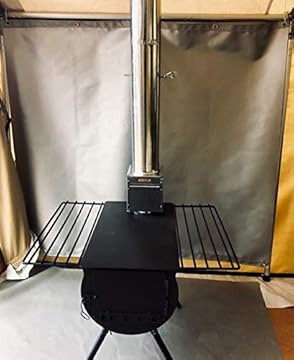
How to Use a Wood Burning Tent Stove
In this article I cover the key areas on how to use a wood burning tent stove. The guide is aimed at people new to hot tenting inside of a canvas tent.
I would suggest to use this article as part of your research before visiting a National Park with your tent and stove.The more information you have the better.
In regards to keeping the stove lit while sleeping. I would strongly suggest only doing this if you have someone stay up on fire watch. Never leave a lit stove unattended at night.
It’s important that you take a sleep system that matches the temperatures outside. If the temperature is going to be below freezing make sure your sleeping bag has the correct rating for such conditions.
Let’s start by taking a look at what to do when you first take delivery of your stove and the curing of a new stove.
Popular Posts
As an Amazon Associate I earn from qualifying purchases. Thank you for helping to support the site.
Curing and Testing The Stove
Whichever type of tent stove you have it’s essential that you break in and cure the stove prior to actually using the stove on its first serious use inside of a tent.
Find a place that doesn’t have a fire ban, has plenty of wood to process and burn. You could do this in your backyard if it’s suitable or just drive to an area with a short hike to an open spot.
I would suggest the first burn to be at least 4 hours. The reason for this is to check the integrity of the stove after prolonged use. It also removes any surface paint and oil.
Check the stove integrity
After you have had the stove running for around 4 hours, let it cool down and remove all the ash. Make sure the ash has fully extinguished.
The next phase is all about checking over the integrity of the stove after its first burn.
Check all the walls for warping, the top, lid and door. What we’re looking for here is to see if any seems to have pushed loose and generally to make sure the stove is still solid in construction.
Depending on the material of the stove, it will have a different, more dull looking appearance. Stainless steel takes on a nice patina to its surface, this is perfectly normal.
Second stove burn
The first burn is essential, don’t skip this stage. I’d also suggest using the stove for a second time to cook a meal.
Practicing using all the features such as dampers, air flows, steel grates and so on while actually using the stove to cook is good practice before heading out into the wilds.
This second cooking test stage is entirely up to you. But I think you’ll thank me for suggesting when you test the stove while cooking. There’s always something that crops up.
Better to solve any problems now before heading out for the real outdoors.
Heat Safe Base
The base on which you place the stove is absolutely critical. The ground must be level directly underneath the stove, so there is no movement / play below the stove legs.
Although heat rises, the ground directly below where the stove is placed is still going to get hot.
Some canvas tents have a zip/out section in the ground sheet as an area for the stove to be placed. It’s down to preference whether you remove this section if your tent has one.
Fire proof stove mat
I would always suggest using a fireproof stove mat designed specifically for the job.
Montana Canvas provide 5’x4’ silicone coated mat that you can also use to hang on a side wall using brass grommets down one edge.
For smaller stoves, you may be able to find a large enough flat rock to place the stove onto, near your pitch location.
A rock will act as an extra heat retainer, and also keep the base area fireproof too.
If you’re pitching on deep snow there are a lot of other considerations in regards to basing your tent stove. Which leads me onto the subject of hot tenting in winter.
Hot Tenting in the Snow
I’m going to briefly mention here about hot tenting in the snow. First of all I’d suggest leaving this only to folk who have some experience in 3 season tent stove use prior to winter.
There are a whole tonne of techniques on how to live inside a hot tent during expreme snow conditions. Paul Kirtley has written a fantastic guide on the art of living inside a tent in such conditions which is well worth a read.
Heat Shields
Whether you need to use a heat shield will largely depend on stove placement which I’ll come onto shortly.
If your stove is fairly close to the canvas wall of your tent, as a safety precaution it’s advisable to use some form of heat shield.
You can use the Montana Canvas mat as mentioned earlier, alternately a thin gauge sheet of aluminium which you can pick up at a local hardware store can be used.
Aluminium sheet heat shield
If you fold the aluminium sheets in half it makes it easier to transport, the fold also allows you to stand them upright, in which case they are greatest for directing the heat away from people inside the tent if it gets too hot.
A final word of caution. Make sure the sides of the tent do not get too hot. This has been known as a major cause of tent fires in the past, so always keep an eye on the temperature of tent walls in close proximity to the stove.
Tools for Tent Stoves
I’ll mention here some of the key items or tools that are essential to run a wood stove inside a tent.
- Gloves
- Fire extinguisher
- Fix blade knife to baton wood
- Folding saw
- Stove pipe cleaner
- Poker / scraper – push fire into back of stove
Gloves
You need a pair of gloves to operate a wood burning stove. They get very hot, hot enough to peel the skin straight off in fact.
There are a tonne of options in regards to gloves. My suggestion is to source a pair of cowhide gloves.
Cowhide withstands extreme temperatures. This pair from Revco have reinforced palms and thumb are ideal for the job.

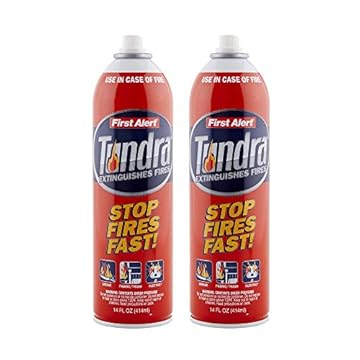
Fire extinguisher
Again, there’s a load of options to go with in regards to fire extinguishers. A small powder fire extinguisher will be more than adequate.
First Alert has a small aerosol that comes in a pack of 2. Ideal for having with you inside a canvas tent.
Cleaning The Stove
Cleaning the stove will be a daily occurrence, there is no way of getting around it. The strove should come with a scraper / poker. If it doesn’t then you’ll definitely need one.
Being able to scrape the embers to the back of the stove allows for better burn efficiency.
The stove pipe or flue will need to be cleaned every day if the stove is in continuous use. Even after a full day, a 2 inch stove pipe will have narrowed to around 1 inch. This is due to a build up of creosote.
Do not skip the cleaning of the stove pipe. Carbon monoxide build up becomes a real issue when the pipe has narrowed due to soot and creosote deposits.
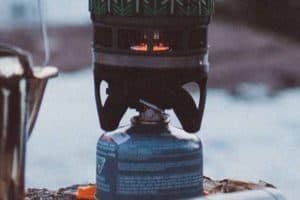
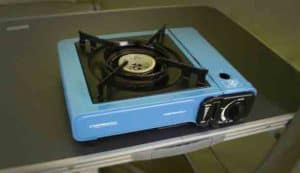
Tent stoves & Carbon Monoxide
It’s less of a problem with wood burning tent stoves compared to a butane / isobutane canister stove inside a small tent.
Keep the tent stove clean, free from ash. Check air flow. Clean out the flue pipe at least every 2 days, I’d strongly suggest once per day. The pipe fills with creosote over time. Start with the top section which will have the most build up.
Carbon Monoxide Detector
This is an essential piece of kit to take with you. Place the carbon monoxide detector on the floor away from the stove.
One of my personal favorites is the Alert Plus, but you can pick up one of these from any hardware store for around 5 bucks.
Processing Wood
The bush crafters amongst us would dedicate a whole article on the art of processing wood. In essence you need basic tools, a folding hand saw and a fixed blade knife. You can use a small hatchet if you wish.
Something like a Condor Bushlore Knife is ideal to get you started. They’re not too expensive and make an ideal knife for batoning wood.

When cutting the wood into lengths bare in mind the length of the stove box. You obviously don’t want to cut the wood so it’s too long to fit inside.
- You will need 3 sizes of wood, plus kindling
- Small – Start the fire box.
- Medium – Use during the day for cooking.
- Large – Use later in the evening.
Drying wood
If your camping in the winter which is more than likely, then the wood you have processed to burn will need to be dried
There are 3 areas to consider placing the wood to dry out.
Wood on top of stove for really soaked wood.
Underneath the stove for less wet.
Leave some wood wet for evening burning as it burns slower.
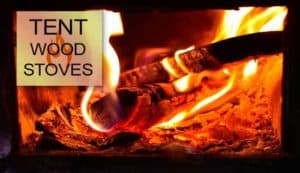
Starting the Fire Stove Box
Now you have all your wood processed. It’s time to start the fire. Open all the air vents fully at the front and leave the pipe damper open.
Smoke will billow from the pipe at the start of the burn until the fire box heats up for cleaner burn.
Take a look at the video below to see how to use a “Swedish Fire Lay” technique. This technique is well proven to last and avoids burning-out failure.
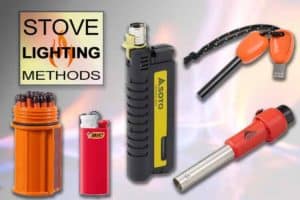
In terms of ignition, good old matches work fine. Check out my guide of stove lighting for further lighting options.
Tent Stove Jacks
The stove pipe is a critical part of any tent stove set up. Where you place the stove inside your tent affects a number of factors.
This video has some great advice on stove jacks for canvas tents. It’s recommended to place the stove jack at least 3 feet away from the tent walls. The more flue pipe inside the tent the better the heat transfers.
Wilderness Guidelines And Regulations
Before heading out into the wilds. Make sure you know all the rules and regulations for the National park you intend to camp.
Some parks have a no bio-fuel stoves rule. To find out the guidelines for a specific park check out the link to National Parks.
Popular Posts